CGDI Prog MB user manual: How to replace used/new ELV and replace ELV simulator.
Part 1: Replace ELV CGDI MB
Part 2: Replace ELV Simulator with CGDI MB
Part 1: Replace ELV CGDI MB
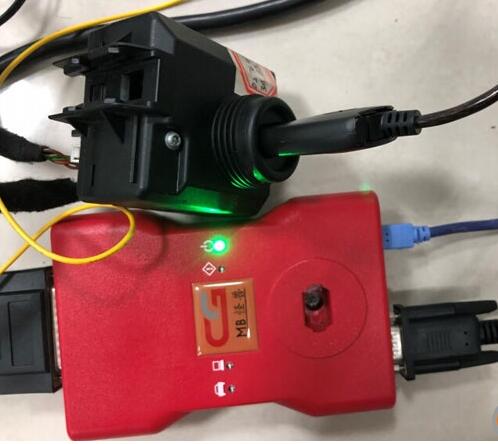
Connect the power, USB cable OBD connection device
The vehicle is replaced with a used or new ELV
I. Replace used ELV
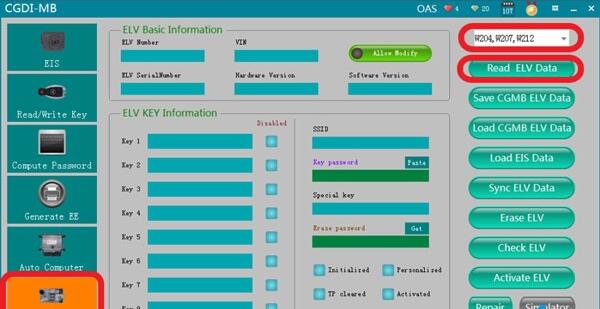
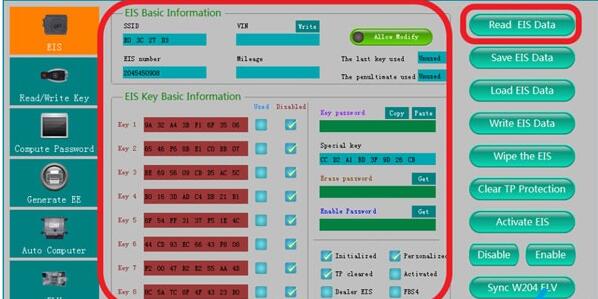
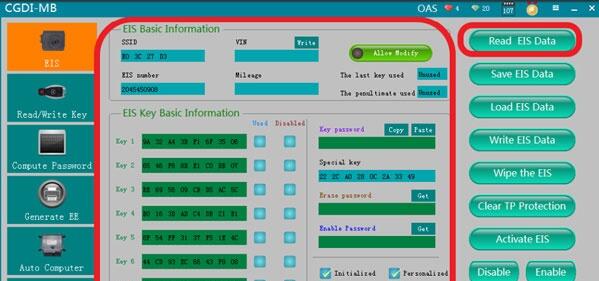
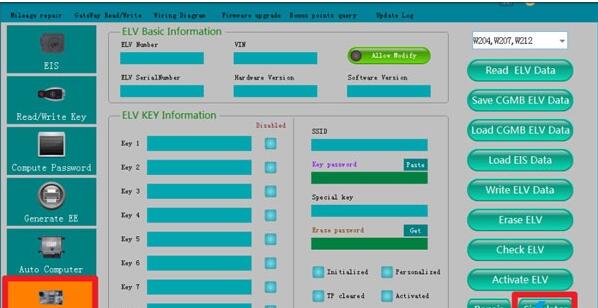
OBD connects to vehicle, open software, click ‘Read ELV Data
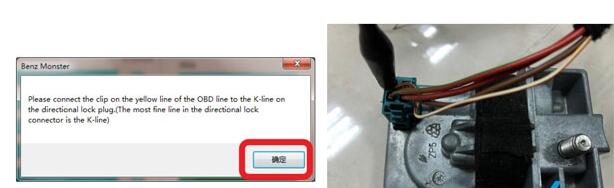
please connect the clip on the yellow line of the OBD line to the K-line on the ELV plug.
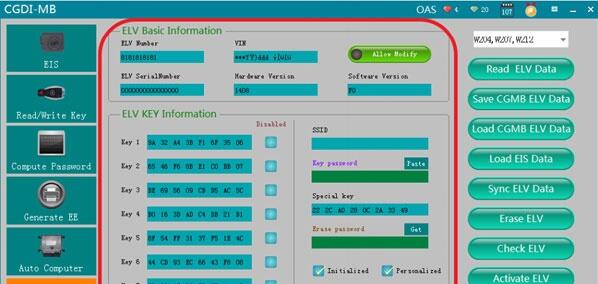
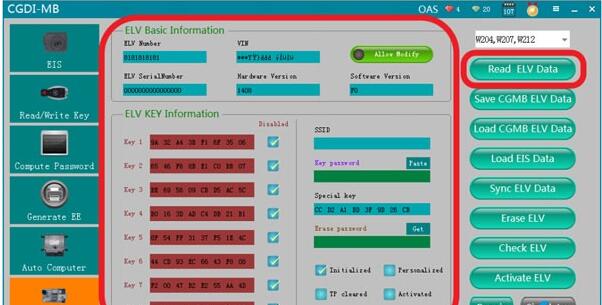
Read the data successfully, show the related information
ELV is normal and can do repairing
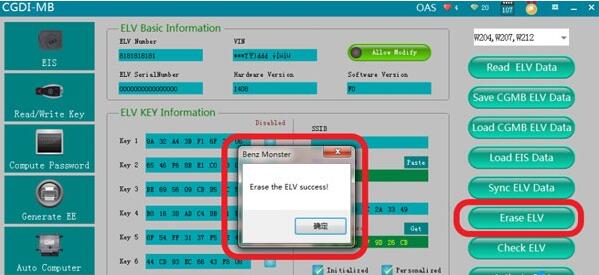
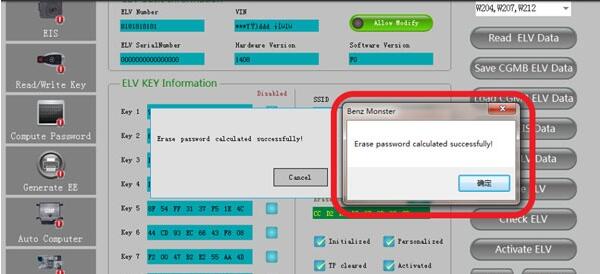
Get ELV erase password
Erase the ELV success
Read ELV data again, to display related information after erasing
II. Replace new ELV
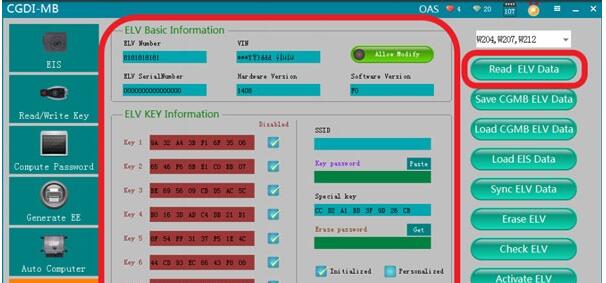
After reading the whole new ELV data,the related information is showed as above,you can do following
operations without wiping ELV data.
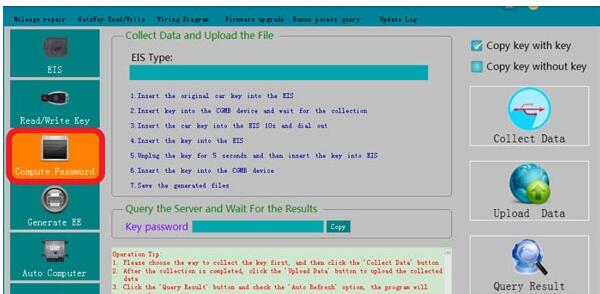
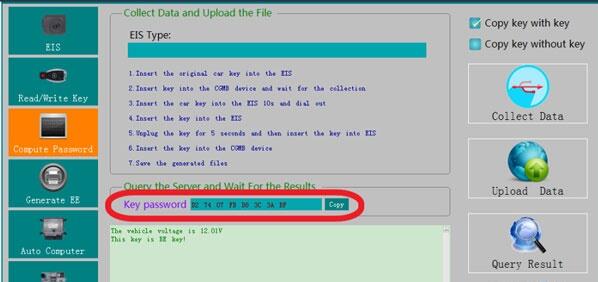
Collect and calculate anti-theft passwords
c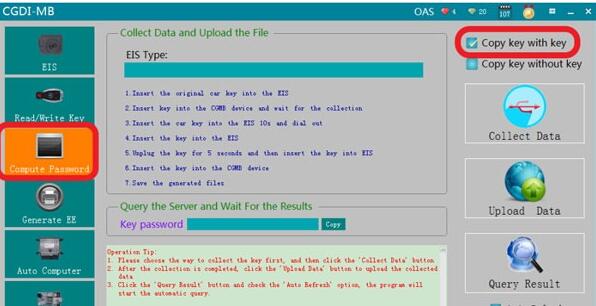
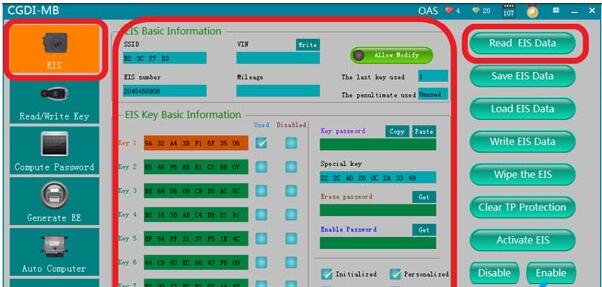
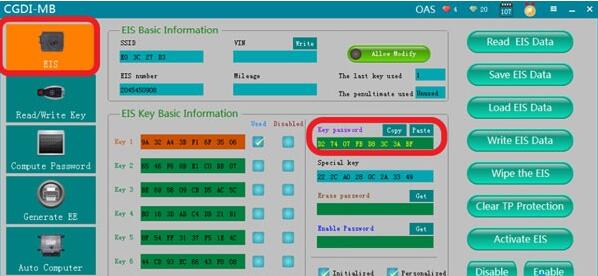
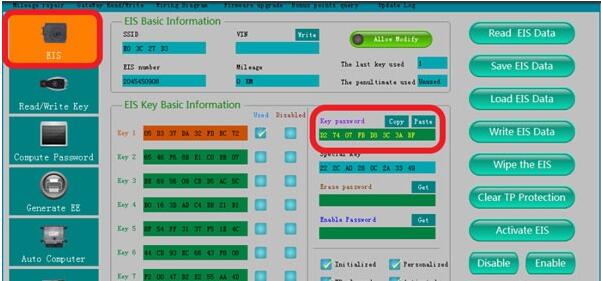
Read EIS Data
Enter“computer password”,choose ”copy key with key”(If you lost all keys,you can choose ” copy key
without key”)
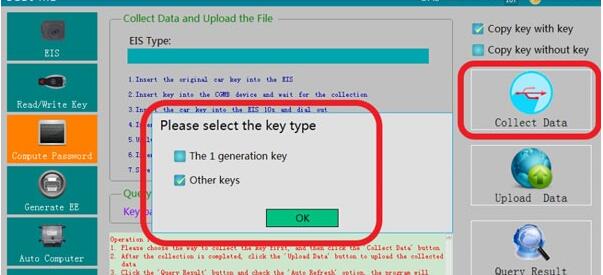
Default “other keys”, click ”OK
The collection process will not be described one by one, follow the software prompts, eventually you can get
the anti-theft password .
Copy and paste the password to ELV
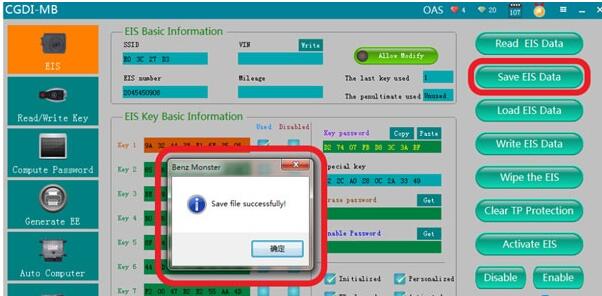
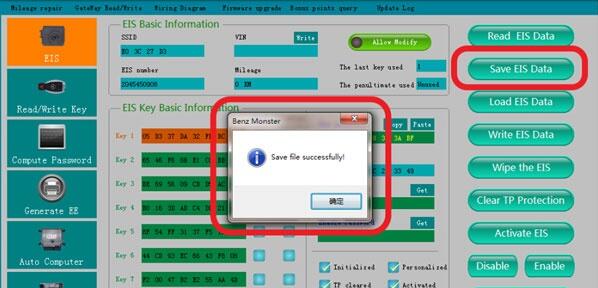
Save ELV data(Please default file name)
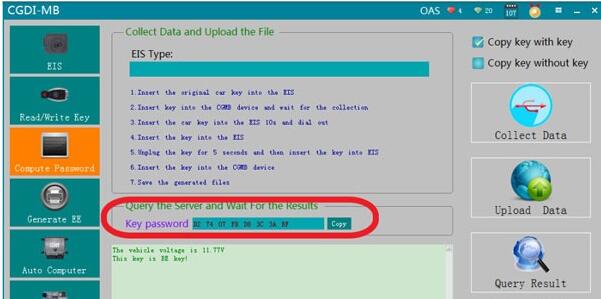
Get erase password successfully
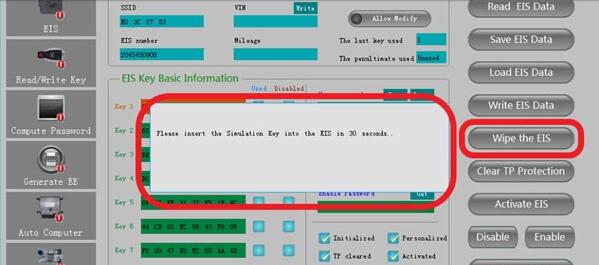
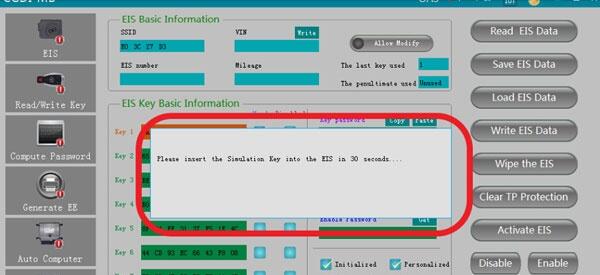
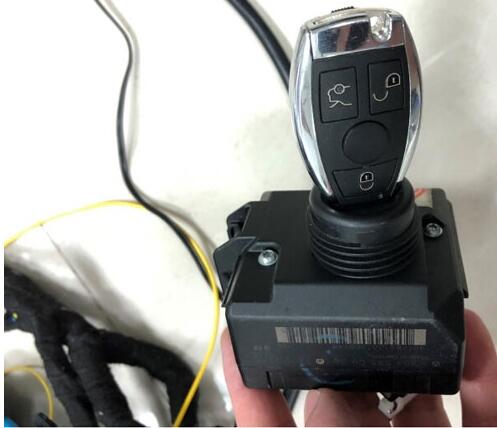
Click ”wipe the EIS ”,It will shows ”please insert the simulation key into the EIS in 30 seconds”
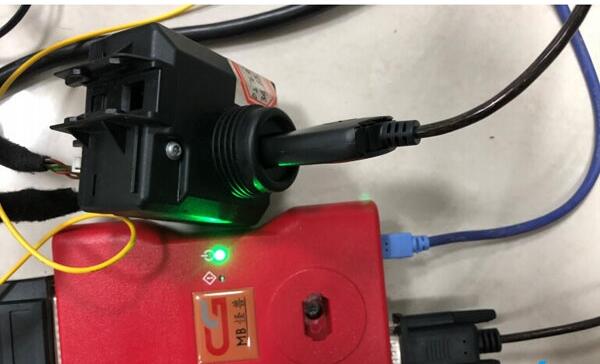
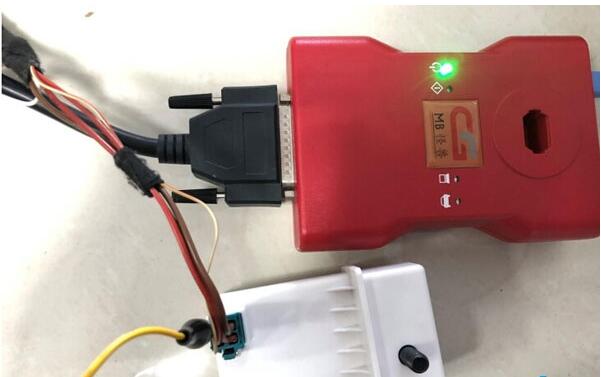
Picture for physical operation
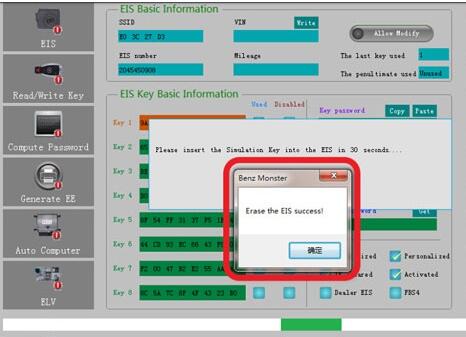
Erase the EIS success
Read EIS data again to show related information
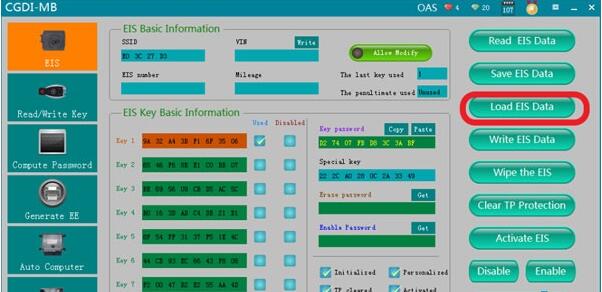
Load the origin data(the ELV data saved initially)
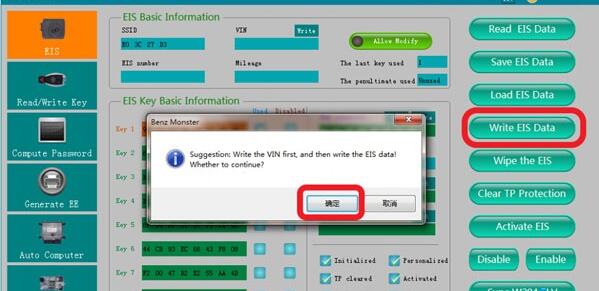
Click ” write EIS data”

please insert the simulation key into the EIS in 30 seconds
physical operation connection
Write EIS data success

Read EIS data again to show related information
Click“sync w204 ELV”,when it shows sync w204 ELV success, please insert key into EIS for activation
Activated successfully , can be used normally
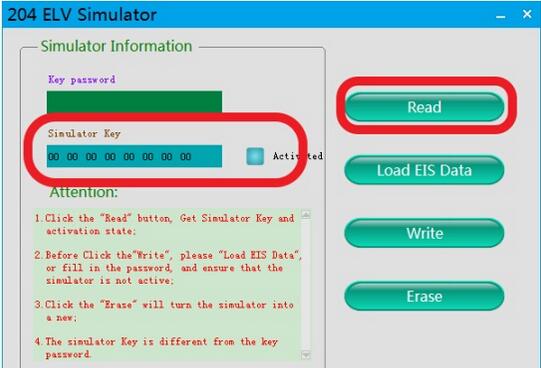
Part 2: Replace ELV Simulator with CGDI Prog
Read EIS data
Turn to“compute password”, collect data
The collection process will not be described one by one, upload data, successfully query the password and
copy the key password
Turn to the EIS interface and paste the key password
Save data,Default file name
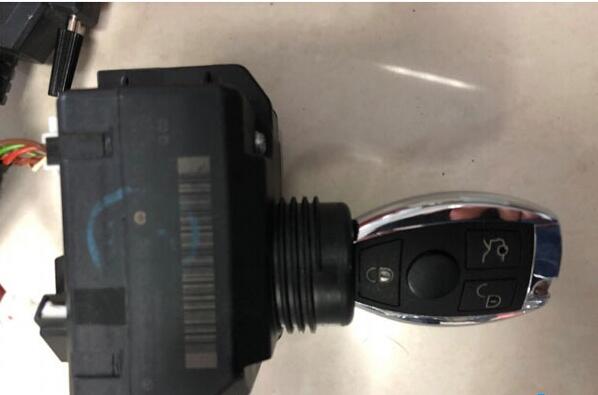
Put on the CGDI ELV renew simulator and clip the K-line
Click“ELV”, enter“ simulator”
Read Simulator, display related information
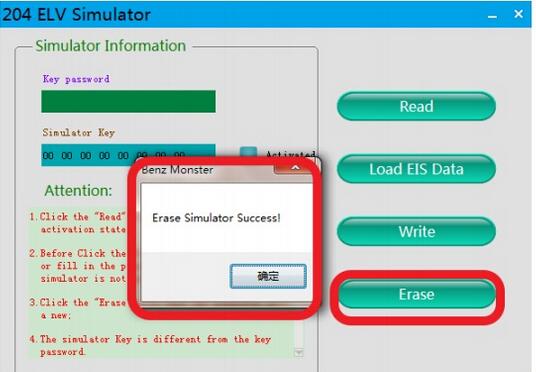
erase simulator success
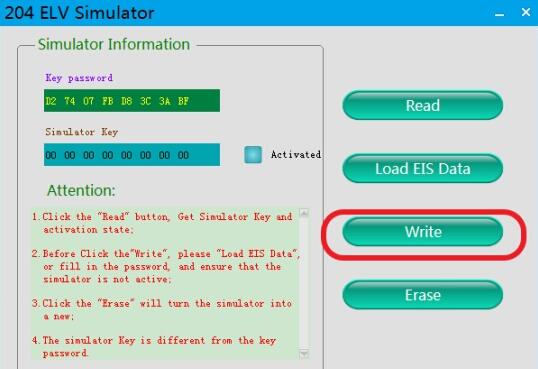
Load the EIS data just saved and check whether the key password is correct
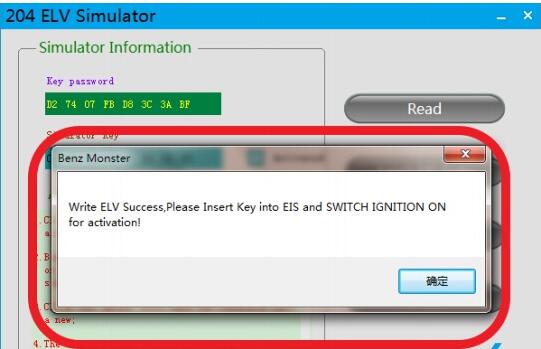
Click ‘write’ button
Write ELV success, please insert key into EIS and switch ignition on for activation
Actual operation
Read simulator again, show activated, match successfully!
Leave a Reply