But if you want to buy the SD Connect Compact4, please just Whacking this link!
https://www.cnautotool.com/category-172-b0-MB+Star+C4.html
We suggest you read this blog beofre your action, if you:
want to change the laptop software by swap the HDD
want to upgrade the software version
want to fix your SD Connect Compact4 Original Touch Screen
want to see Pandora’s Box as same as us
Now let’s star the details Disassemble steps of the SD Connect Compact4 Original Touch Screen Laptop.
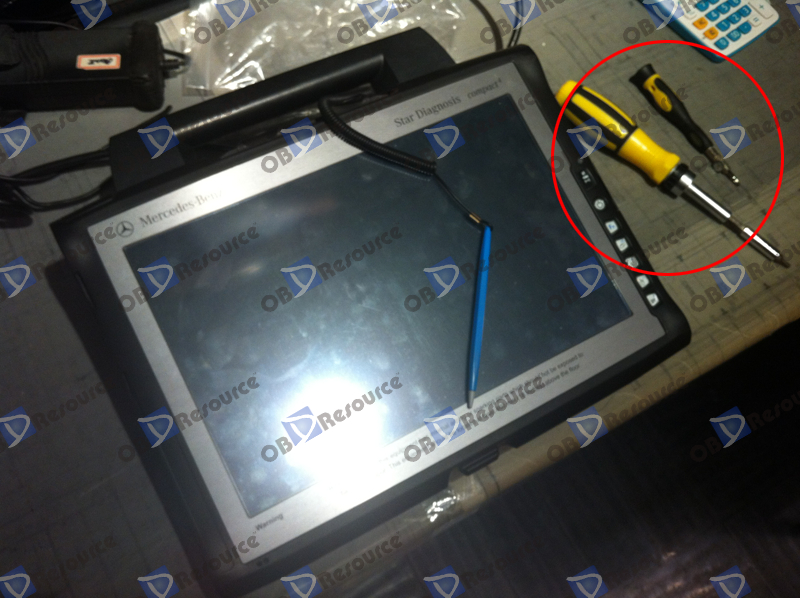
1. You need 2 pcs Hex screwdrivers as the picture shows, different types.
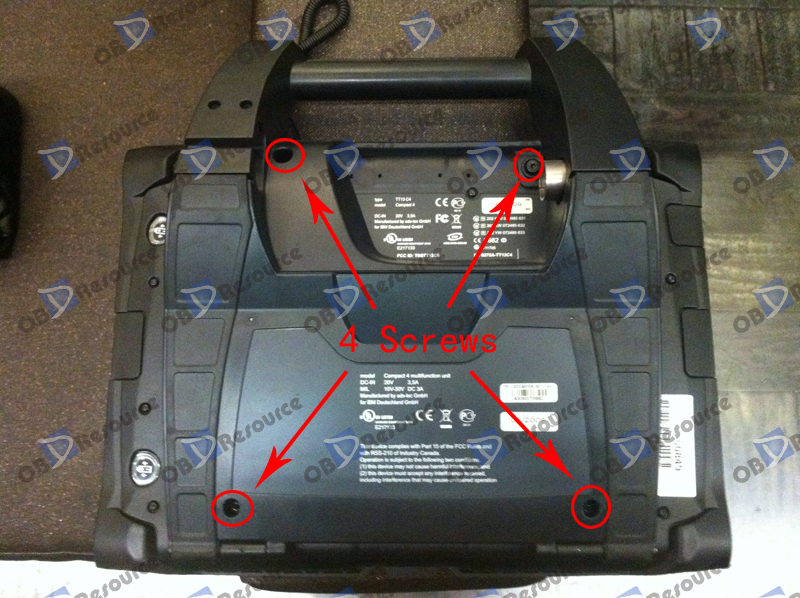
2. Go the back of the laptop, you need remove 4 screws firstly by the bigger size screwdrivers.
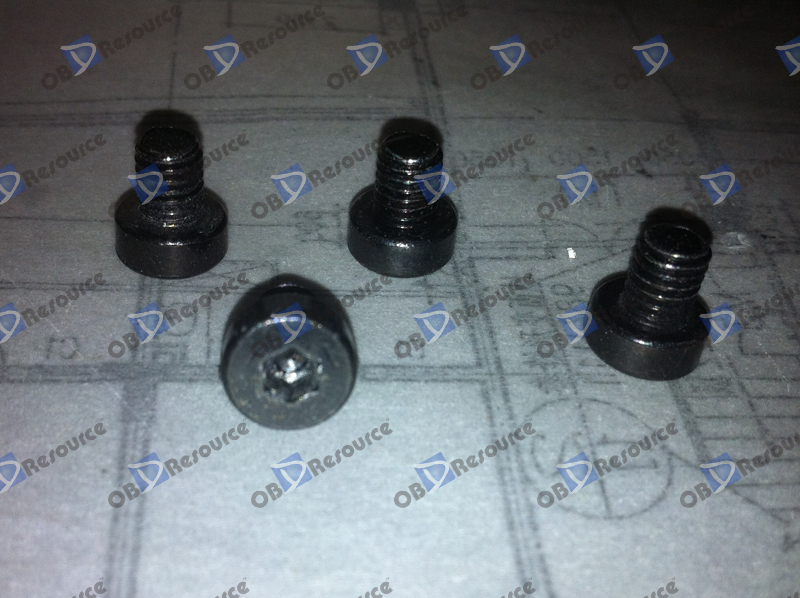
3. The 4 pcs big screws as below:
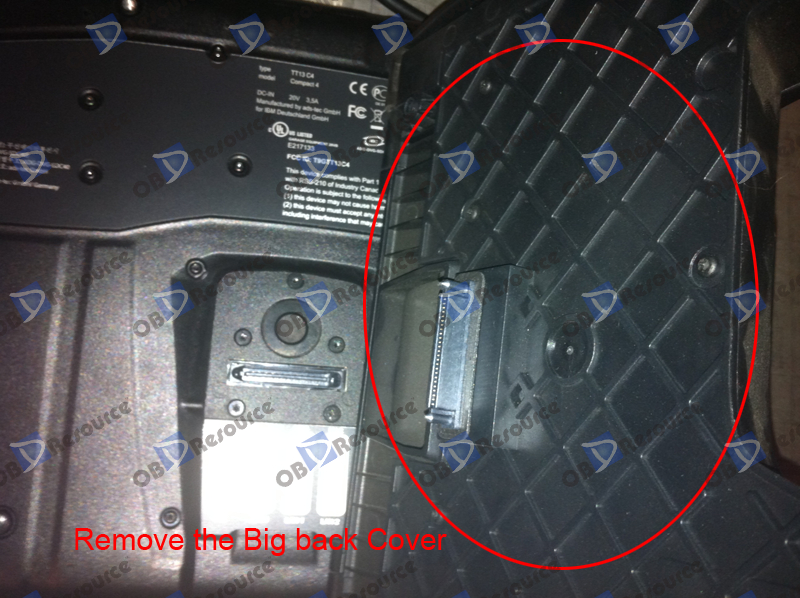
4. Now remove the back cover (there are 4pcs fans inside the box to ensure the laptop Cooling)
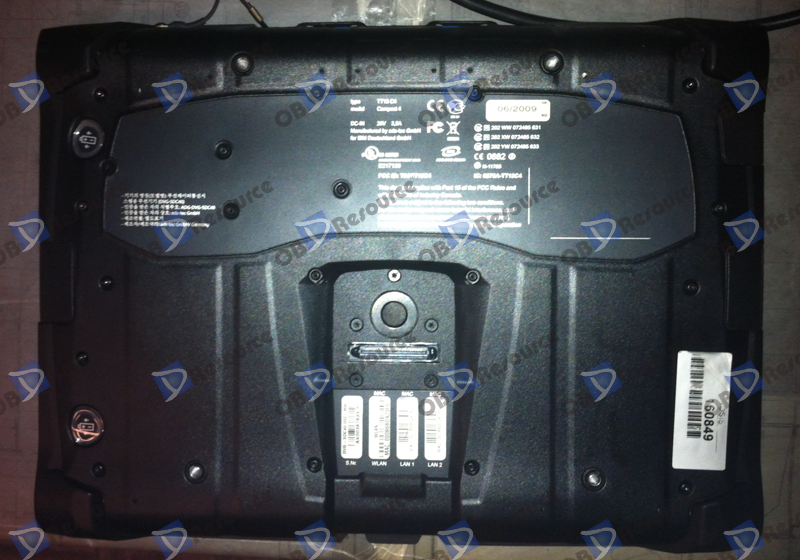
5. Now you can see the back of the SD Connect C4 touch screen laptop true face.
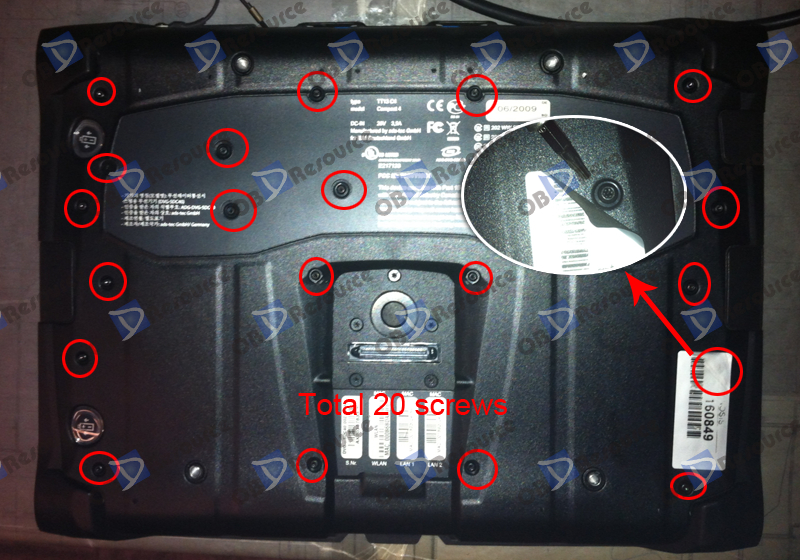
6. Next, it is carefully work, because there are total 20pcs screws need to remove, i have marked by red circle, please remove one by one. (One of them hidden under the label.)
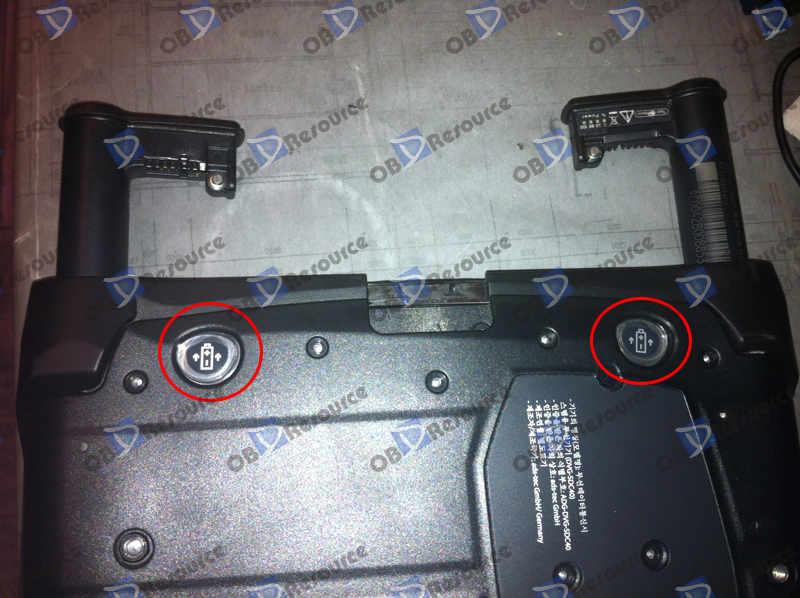
7. After remove the 20 pcs screws, it’s the time to remove the 2 pcs battery of the SD Connect Compact4 laptop. Press the 2 buttons as the picture shows, the battery will be pop out automatically.
8. Remove the back cover of the laptop carefully.
9. Now we facing a metal protect cover, hard work is still need to remove 23 screws as the picture marked.

10. Also please pay attention to these 2 screws.
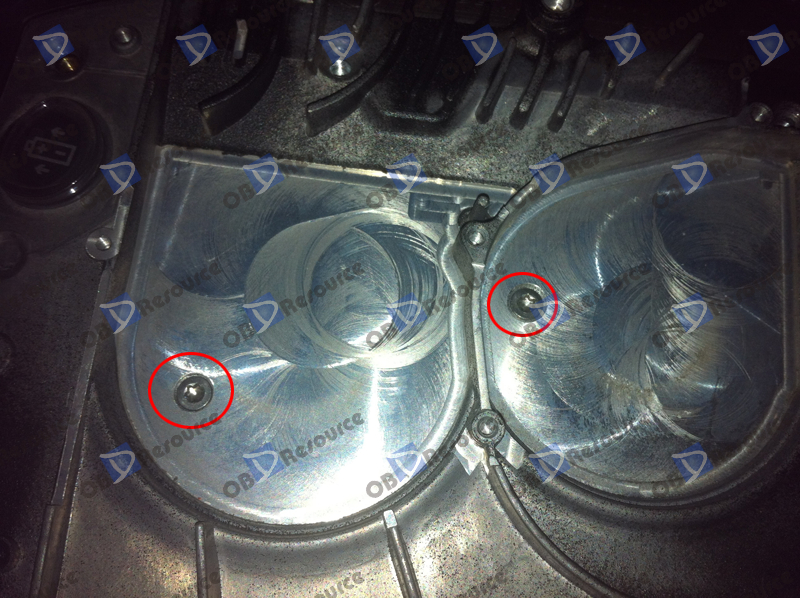
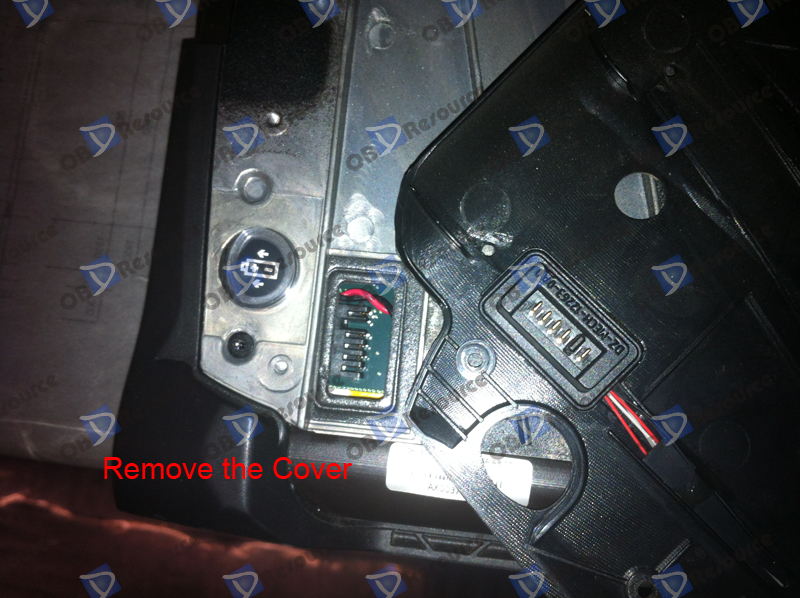
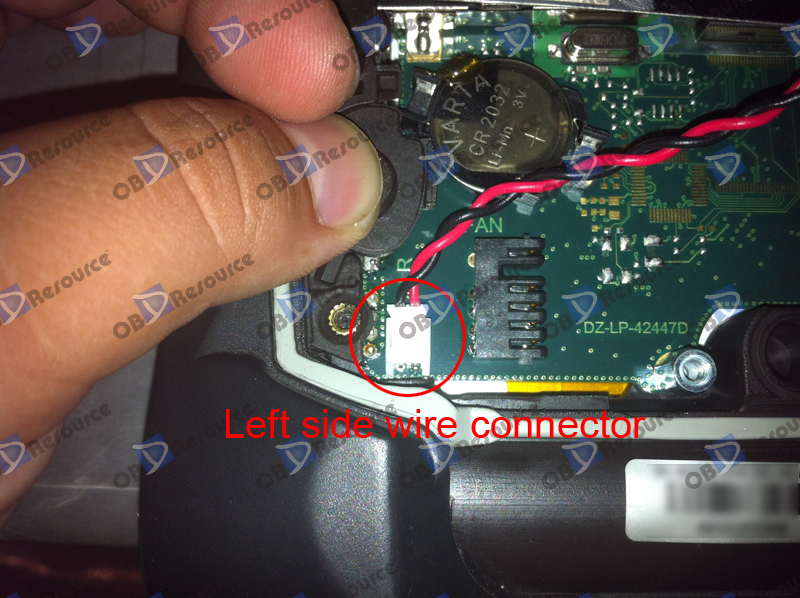
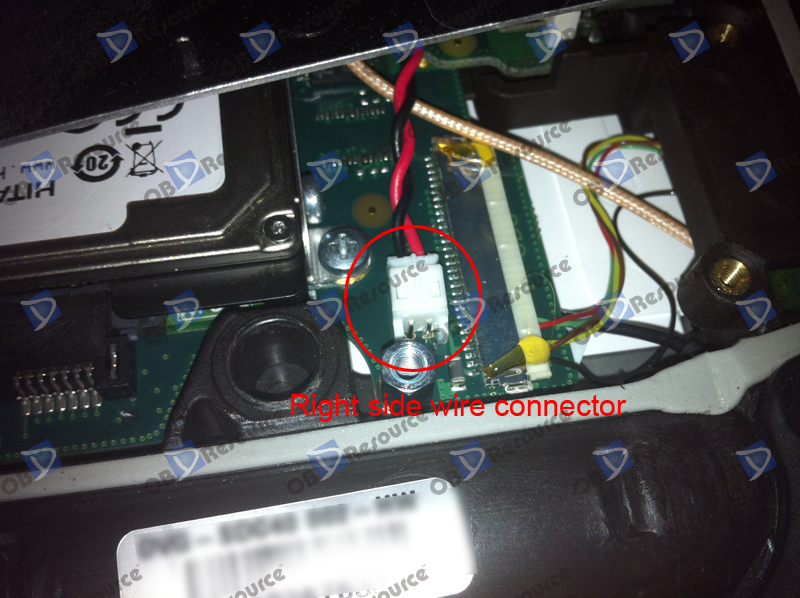
11. Before you remove her metal “clothes”, please pay attention to that, there are still 2 wire connecting for power supply of the fans.
sd connect c4 laptop left wire
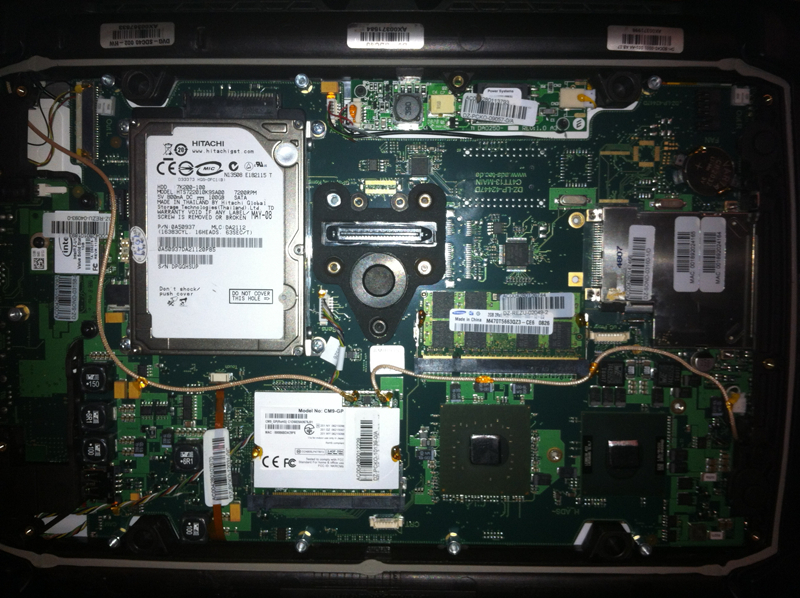
12. Now till this step, we opened the Pandora’s Box, you can see all the details story now!
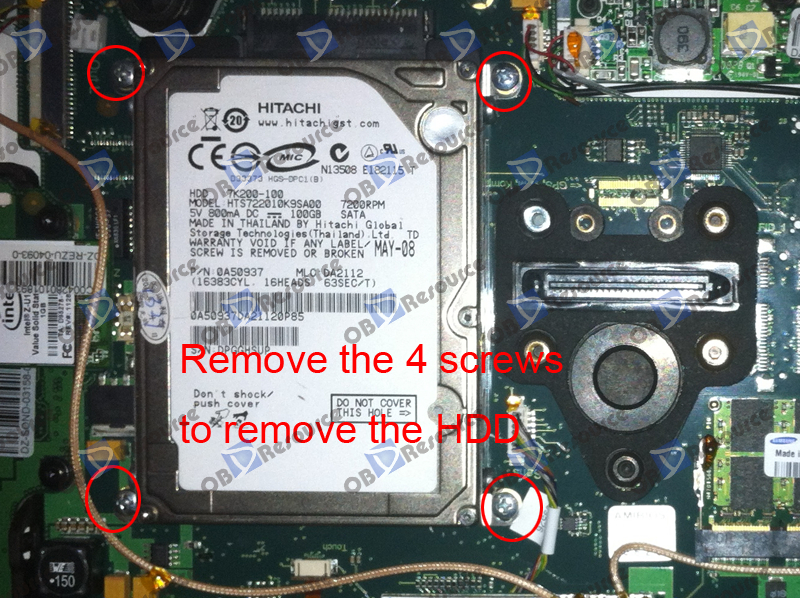
13. After this, you can remove the last 4 screws to swap the HDD as many time as you want to.
14. Lastly, we upload a photo for Super MB STAR software well installed with the original SD Connect Compact4 touch screen laptop.
Final Notice: Keep your screws well!
If you have any problems, don’t hesitate to contact us, send email to sale@cnautotool.com. FREE, Professional & Unlimited Technical Support, Factory Price!
Leave a Reply