1.Software update
1). Our GM MDI software has updated to V2017.09.It can support 2010-2017.09 year new cars.
2). If you think installation procedure is difficult for you,you can choose the GM MDI with Lenovo E49AL laptop,GM MDI software will be preinstalled in the Lenovo E49AL Laptop ,you can use it directly after receiving it.

2.“No Connection” error solved
Here is the detail explanation of GM MDI WIFI multiple diagnostic system “no connection” error and solution.
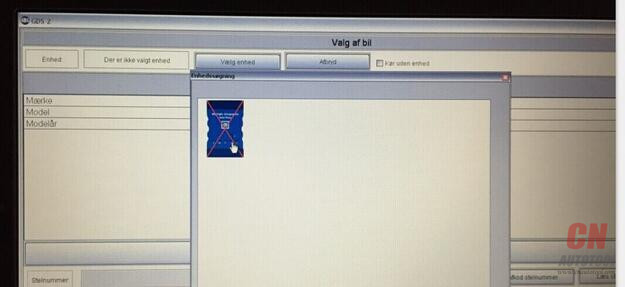
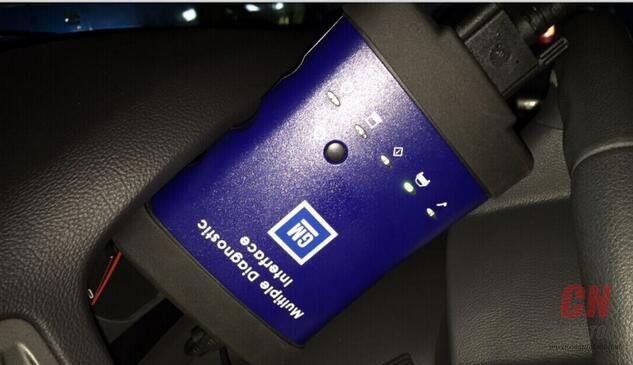
Problem:
When get the GM MDI tool from www.cnautotool.com connected with computer and plugged into car’s DLC OBD port, only two of the indicator light flashed while the other two are off. And then the GM MDI software system displayed “no connection” error message. See Fig.1 and Fig. 2.
Possible reason:
Improper operation procedure leads to the communication failure.
Solution:
Quit the GM MDI software and disconnect the GM MDI main unit
Open MDI Manager to check the driver
Open “Network setup” to check the network condition
If your MDI Manager shows a connection with your MDI and says software is compatible with pc, it is OK.
Reconnect the MDI device and load software again.
Follow the correction connection procedure and settings:
USB connection:
Once install and run the MDI manager, power up the MDI tester using the A/C 12-volt adapter. Then connect it to your computer with via USB cable. The automotive scan tool MDI appears in the application’s Explorer window where all the MDI units detected by your PC.
WIFI wireless connection:
1) Click MDI_Manager icon to start the MDI Manager software
2) Connect MDI with PC using USB cable
3) Power on the MDI by plugging in the A/C 12-volt adapter
4) Select and Connect to your MDI in the MDI Manager software MDI Explorer tab.
5) Select “Network Setup”
6) Select “Wireless” tab.
7) Select “Enable Wireless Interface check box in the Interface Control box to enable the interface. Once you enable the interface, the IP Address Configuration box and the Apply and Cancel buttons become active.
8) Select Obtain an IP address automatically if your LAN automatically assigns IP addresses. Otherwise enter the assigned IP Address and Subnet mask.
9) Select “Access Point” to start wireless access configuration.
10) If you are not within range of the access point you want to use, or the access point is not broadcasting its SSID, select the Enter Network Name [SSID]: radio button and type the network name.
11) If you are within range of your wireless access point, choose the Select from available network list radio button and then select Refresh to cause the MDI to search for wireless network signals. The detected networks are displayed in the Network Name box.
12) Select Configure after you have entered the network name
13) Enter the security setting that are required by your network, then select Next.
14) Select Yes to re-configure your MDI, or if you want to start over select No.
15) Select OK.
16) Choose the Properties tab to verify that the MDI is configured correctly.
17) Write down previous settings you did for future reference.
NOTE:
Installing the MDI Manager software installs certain utilities that are required for your TIS2Web programs to use the MDI. But, it is not necessary to start the MDI Manager software before using TIS2Web programs.
Leave a Reply